

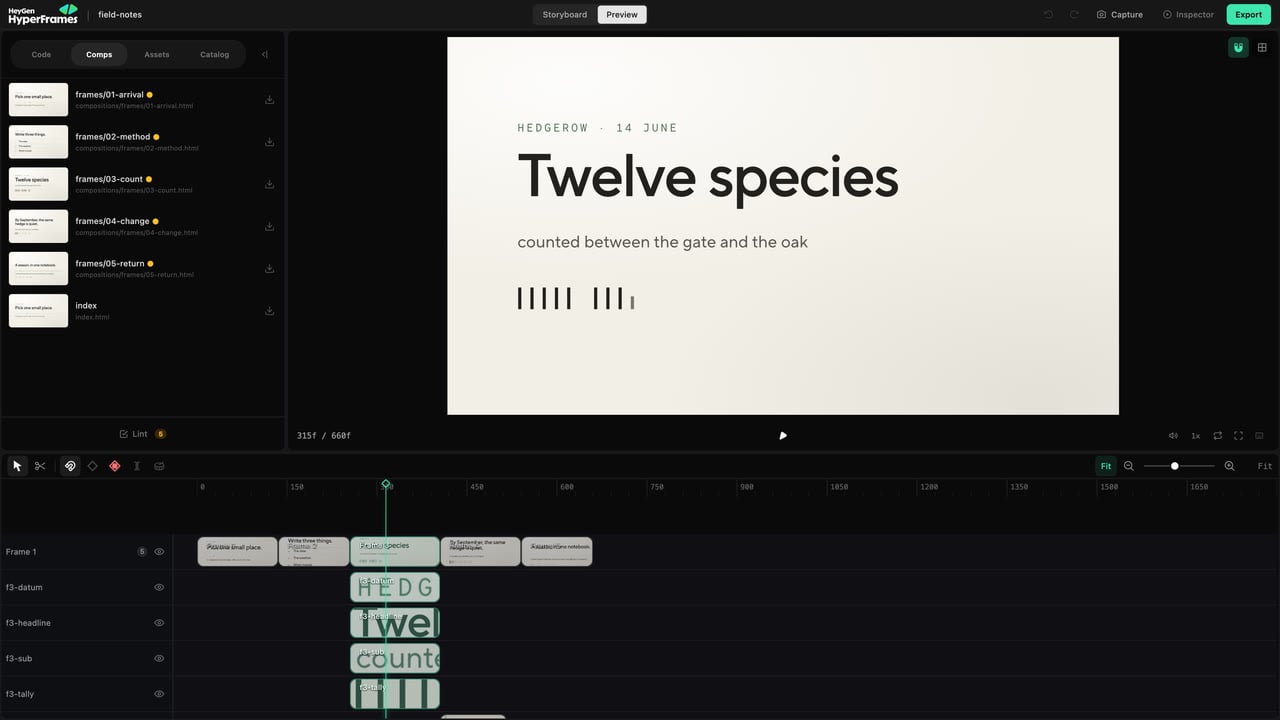
Preview keeps the project tools, live canvas, Inspector, and timeline in one workspace.
1. Storyboard and Preview
The view switcher changes between:- Storyboard — planned frames, direction, status, comments, and agent handoff.
- Preview — the built project, including the canvas, Inspector, timeline, project files, media, Catalog, and exports.
2. Canvas
The canvas shows the current frame. Click an element to select it. When an element supports direct editing, you can move, resize, rotate, crop, or nudge it. Selection guides and snapping help align it with the frame and nearby elements. If an element is difficult to select, open Inspector, then use Layers.3. Inspector
The inspector shows controls for the selected element. Depending on what you selected, it can include:- text;
- layout and position;
- fill, border, shadow, and other styles;
- media;
- animation;
- 3D transforms;
- color grading.
4. Timeline
The timeline answers three questions:- When does an element appear?
- How long does it remain?
- Which other elements are active at the same time?
5. Project tools
The left side of Preview contains:- Code for the project tree and source editor;
- Comps for compositions and sub-compositions;
- Assets for project and shared media;
- Catalog for reusable scenes and components.
A safe first edit
1
Pause on the frame you want to change
Move the playhead or click the timeline ruler.
2
Select one visible element
Click it on the canvas or choose it in Layers.
3
Make one small change
Edit its text, move it slightly, or change a simple style.
4
Play through the surrounding moment
Check the edit in motion, not only as a still frame.
5
Undo if needed
Use the Studio undo action or your normal undo shortcut.